2016年6月3日 星期五


6/3 期末考 不重複


<html> <meta charset="UTF-8">  <head>   <title>期末2</title>  </head>  <body>   <script>    var balls = new Array(10);    var i=0,j=0,k=0;    for(i=0;i<10;i++)    {     balls[i]=i+1;    }    for(i=1;i<=1000;i++)    {     j=Math.floor(Math.random()*9);     k=Math.floor(Math.random()*9);     balls[49]=balls[j];     balls[j]=balls[k];     balls[k]=balls[49];    }    document.write(balls[0]+","+balls[1]+","+balls[2]);   </script>  </body> </html>

2016年6月2日 星期四

4/29  HTML顯示Hello world!的字串  文字檔改HTML

http://pclevin.blogspot.tw/2011/12/javascriptjavascript.html

貼在WORDPAD裡 檔名改test.html
<html>
<head>
<meta http-equiv="Content-Type" content="text/html; charset=BIG5">
<title>第一支javaScript</title>
</head>
<body>
<h2>document.write用法</h2>
 <Script type ="text/javascript">
  document.write("Hello world!!");
 </Script>
</body>
</html>


<html>
<head>
<meta http-equiv="Content-Type" content="text/html; charset=BIG5">
<title>第一支javaScript</title>
</head>
<body>
<input type="checkbox" name="interest" value="單 打 獨 鬥" id="1"><label for="1">單 打 獨 鬥---------------</label><label for="demoradio_1">

<div class="qheader">
1) What is the difference between a jungle and a rain forest?</div>
<div class="qselections">
<input type="radio" value="a" name="question1">a) No difference. Simply two different ways in referring to the same thing.<br>
<input type="radio" value="b" name="question1">b) A jungle in general receives less rain than a rain forest.<br>
<input type="radio" value="c" name="question1">c) A jungle refers to the thickest area of a rain forest<br>
<input type="radio" value="d" name="question1">d) A jungle and a rain forest each contain their own group of distinct plants and animals.<br>
</div>

<br>

<h2>document.write用法</h2>
 <Script type ="text/javascript">
  document.write("Hello world!!");
 </Script>
</body>
</html>

2016年5月20日 星期五


5/20  HTML   4個選擇 畫圓餅圖


<html>
  <head>
    <script type="text/javascript" src="https://www.gstatic.com/charts/loader.js"></script>

    <script type="text/javascript">

 var a,b,c;
 var n1,n2,n3,n4;

      google.charts.load('current', {'packages':['corechart']});
      google.charts.setOnLoadCallback(drawChart);
   
 function Ran(){

 n1 = 0;
 n2 = 0;
 n3 = 0;
 n4 = 0;

 var maxNum = 10;
      var minNum = 0;
      n1 = Math.floor(Math.random() * (maxNum - minNum + 1)) + minNum;
 n2 = Math.floor(Math.random() * (maxNum - minNum + 1)) + minNum;
 n3 = Math.floor(Math.random() * (maxNum - minNum + 1)) + minNum;
 n4 = Math.floor(Math.random() * (maxNum - minNum + 1)) + minNum;


     drawChart();
 }

      function add() {
   

      a=0;
      b=0;
      c=0;

 var radio1 = document.getElementsByName("v1");
 var radio2 = document.getElementsByName("v2");
 var radio3 = document.getElementsByName("v3");
 var radio4 = document.getElementsByName("v4");

   for(var i=0;i<radio1.length;i++)
   {
     if(radio1.item(i).checked==true)
     {
i = i+1
     alert(i);
if (i==1)
  {
a=a+1;
  }
if (i==2)
  {
b=b+1;
  }
if (i==3)
  {
c=c+1;
  }
  }}

     for(var i=0;i<radio2.length;i++)
   {
     if(radio2.item(i).checked==true)
     {
i = i+1
     alert(i);
if (i==1)
  {
a=a+1;
  }
if (i==2)
  {
b=b+1;
  }
if (i==3)
  {
c=c+1;
  }
  }}

     for(var i=0;i<radio3.length;i++)
   {
     if(radio3.item(i).checked==true)
     {
i = i+1
     alert(i);
if (i==1)
  {
a=a+1;
  }
if (i==2)
  {
b=b+1;
  }
if (i==3)
  {
c=c+1;
  }
}}

   for(var i=0;i<radio4.length;i++)
   {
     if(radio1.item(i).checked==true)
     {
i = i+1
     alert(i);
if (i==1)
  {
a=a+1;
  }
if (i==2)
  {
b=b+1;
  }
if (i==3)
  {
c=c+1;
  }
  }}


document.getElementById('c1').value=a;
document.getElementById('c2').value=b;
document.getElementById('c3').value=c;
document.getElementById('c4').value=d;


      drawChart();
      }

      function drawChart() {
     
       var data = google.visualization.arrayToDataTable([
          ['Task', 'Hours per Day'],
          ['A',  n1],
          ['B',  n2],
          ['C',  n3],
 ['D',  n4],
        ]);

        var options = {
          title: 'My Daily Activities'
        };

        var chart = new google.visualization.PieChart(document.getElementById('piechart'));

        chart.draw(data, options);
      }
    </script>
  </head>
  <body>

<h1>你選了什麼?</h1>
<input name="v1" type="radio" value="300年">300年        
<input name="v1" type="radio" value="400年">400年          
<input name="v1" type="radio" value="1000年">1000年
<br>
<h1>你選了什麼?</h1>
<input name="v2" type="radio" value="300年">300年        
<input name="v2" type="radio" value="400年">400年          
<input name="v2" type="radio" value="1000年">1000年
<br>
<h1>你選了什麼?</h1>
<input name="v3" type="radio" value="300年">300年        
<input name="v3" type="radio" value="400年">400年          
<input name="v3" type="radio" value="1000年">1000年
<br>
<h1>你選了什麼?</h1>
<input name="v4" type="radio" value="300年">300年        
<input name="v4" type="radio" value="400年">400年          
<input name="v4" type="radio" value="1000年">1000年
<br>


Section1:
 <input type="text" name="FirstName" id="c1" <br><br/>

Section2:
 <input type="text" name="address" id="c2" <br></br>

Section3:
 <input type="text" name="address" id="c3" <br></br>
Section4:
 <input type="text" name="address" id="c4" <br></br>

 <input type="button" value="submit" onclick="add()"/>
 <input type="button" value="隨機變數" onclick="Ran()"/>
    <div id="piechart" style="width: 900px; height: 500px;"></div>

  </body>
</html>

2016年5月13日 星期五

5/13  HTML  你選了什麼?


<html>

  <head>
    <script type="text/javascript" src="https://www.gstatic.com/charts/loader.js"></script>
 
<script type="text/javascript">
      google.charts.load('current', {'packages':['corechart']});
      google.charts.setOnLoadCallback(drawChart);
      function drawChart() {

        var data = google.visualization.arrayToDataTable([
          ['Task', 'Hours per Day'],
          ['Work',     11],
          ['Eat',      2],
          ['Commute',  2],
          ['Watch TV', 2],
          ['Sleep',    7]
        ]);

        var options = {
          title: 'My Daily Activities'
        };

        var chart = new google.visualization.PieChart(document.getElementById('piechart'));

        chart.draw(data, options);
      }
    </script>
  </head>
  <body>
  <form action="post.php" method="post"  name="add" enctype="multipart/form-data" onSubmit="return check();" >
<h1>1、你選擇什麼?</h1>
<input name="v1" type="radio" value=1>A          
<input name="v1" type="radio" value=2>B          
<input name="v1" type="radio" value=3>C
</form>
<form action="post.php" method="post"  name="add" enctype="multipart/form-data" onSubmit="return check();" >
<h1>2、你選了什麼?</h1>
<input name="v2" type="radio" value="1">A
<input name="v2" type="radio" value="2">B          
<input name="v2" type="radio" value="3">C

</form>
<form action="post.php" method="post"  name="add" enctype="multipart/form-data" onSubmit="return check();" >
<h1>3、你選了什麼?</h1>
<input name="v3" type="radio" value="1">A          
<input name="v3" type="radio" value="2">B            
<input name="v3" type="radio" value="3">C
</form>
<form action="post.php" method="post"  name="add" enctype="multipart/form-data" onSubmit="return check();" >
<h1>4、你選了什麼?</h1>
<input name="v4" type="radio" value="1">A          
<input name="v4" type="radio" value="2">B            
<input name="v4" type="radio" value="3">C
</form>
    <div id="piechart" style="width: 900px; height: 500px;"></div>
  </body>
  <input type="button" value="送出" onclick=("drawChart")/>
</html>
2016年5月6日 星期五

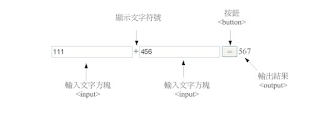
5/6  HTML 加法


http://www.kangting.tw/2012/07/htmljavascriptcss.html


2016年4月22日 星期五

http://pclevin.blogspot.tw/2014/12/android-studio.html
JDK 6 以上的版本。
如果你要開發Android 5.0 以上,請使用JDK 7以上的版本。

圖1 Android Studio 下載

圖2 同意合約 -> 下載

圖3 下載需要一段時間,可以看一下安裝資訊

圖4 下載 後的檔案,執行此檔

圖5 安裝介面 -> Next 

圖6 選擇要安裝的項次 -> Next

圖7 Android SDK安裝說明 -> I Agree

圖8 安裝說明 -> I Agree

圖9 選擇安裝目錄位置
     Android Studio 安裝目錄
     Android SDK 安裝目錄


圖10 設定 Hardwar Accelerated Manager 使用RAM
please set the maximum anount of RAM available for the Intel Hardwar Accelerated Manager
(HAXM) to use for all x86 emulator instances.


圖11 Start Menu Folder . 本例不新增開啟選單

圖12 安執中..

圖13 安執中..

圖14 安執結束 -> Next

圖15 是否啟動Android Studio -> Finish

2016年4月15日 星期五


0219.png


package haha;
import java.sql.Connection;
import java.sql.DriverManager;
public class haha {
    public static void main(String[] args) {
        // TODO Auto-generated method stub
        System.out.println("Hello! World!");
         Connection c = null;
          try {
           Class.forName("org.sqlite.JDBC");
           c = DriverManager.getConnection("jdbc:sqlite:test.db");
          } catch (Exception e) {
           System.err.println(e.getClass().getName() + ": " + e.getMessage());
           System.exit(0);
          }
          System.out.println("Opened database successfully");
    }
}
 
public class HelloWorld {
    public static void main(String[] args) {
        System.out.println("Hello! World!");
    }
}
___________________________________________________
package text1;
import java.sql.Connection;
import java.sql.DriverManager;
public class text1 {
    
    public static void main(String[] args) {
        // TODO Auto-generated method stub
        Connection c = null;
          try {
           Class.forName("org.sqlite.JDBC");
           c = DriverManager.getConnection("jdbc:sqlite:test.db");
          } catch (Exception e) {
           System.err.println(e.getClass().getName() + ": " + e.getMessage());
           System.exit(0);
          }
          System.out.println("Opened database successfully");
         
    }
}

第一個 app


eclipse連接到mysql

http://blog.yslifes.com/archives/918    <-這個網址 按照步驟做

package db;

import java.sql.Connection;
import java.sql.DriverManager;
import java.sql.PreparedStatement;
import java.sql.ResultSet;
import java.sql.SQLException;
import java.sql.Statement;

public class jdbcmysql {
  private Connection con = null; //Database objects
  //連接object
  private Statement stat = null;
  //執行,傳入之sql為完整字串
  private ResultSet rs = null;
  //結果集
  private PreparedStatement pst = null;
  //執行,傳入之sql為預儲之字申,需要傳入變數之位置
  //先利用?來做標示

  private String dropdbSQL = "DROP TABLE User ";

  private String createdbSQL = "CREATE TABLE User (" +
    "    id     INTEGER " +
    "  , name    VARCHAR(20) " +
    "  , passwd  VARCHAR(20))";

  private String insertdbSQL = "insert into User(id,name,passwd) " +
      "select ifNULL(max(id),0)+1,?,? FROM User";

  private String selectSQL = "select * from User ";

  public jdbcmysql()
  {
    try {
      Class.forName("com.mysql.jdbc.Driver");
      //註冊driver
      con = DriverManager.getConnection(
      "jdbc:mysql://localhost/test?useUnicode=true&characterEncoding=Big5",
      "","");
      //取得connection

//jdbc:mysql://localhost/test?useUnicode=true&characterEncoding=Big5
//localhost是主機名,test是database名
//useUnicode=true&characterEncoding=Big5使用的編碼
   
    }
    catch(ClassNotFoundException e)
    {
      System.out.println("DriverClassNotFound :"+e.toString());
    }//有可能會產生sqlexception
    catch(SQLException x) {
      System.out.println("Exception :"+x.toString());
    }
 
  }
  //建立table的方式
  //可以看看Statement的使用方式
  public void createTable()
  {
    try
    {
      stat = con.createStatement();
      stat.executeUpdate(createdbSQL);
    }
    catch(SQLException e)
    {
      System.out.println("CreateDB Exception :" + e.toString());
    }
    finally
    {
      Close();
    }
  }
  //新增資料
  //可以看看PrepareStatement的使用方式
  public void insertTable( String name,String passwd)
  {
    try
    {
      pst = con.prepareStatement(insertdbSQL);
   
      pst.setString(1, name);
      pst.setString(2, passwd);
      pst.executeUpdate();
    }
    catch(SQLException e)
    {
      System.out.println("InsertDB Exception :" + e.toString());
    }
    finally
    {
      Close();
    }
  }
  //刪除Table,
  //跟建立table很像
  public void dropTable()
  {
    try
    {
      stat = con.createStatement();
      stat.executeUpdate(dropdbSQL);
    }
    catch(SQLException e)
    {
      System.out.println("DropDB Exception :" + e.toString());
    }
    finally
    {
      Close();
    }
  }
  //查詢資料
  //可以看看回傳結果集及取得資料方式
  public void SelectTable()
  {
    try
    {
      stat = con.createStatement();
      rs = stat.executeQuery(selectSQL);
      System.out.println("ID\t\tName\t\tPASSWORD");
      while(rs.next())
      {
        System.out.println(rs.getInt("id")+"\t\t"+
            rs.getString("name")+"\t\t"+rs.getString("passwd"));
      }
    }
    catch(SQLException e)
    {
      System.out.println("DropDB Exception :" + e.toString());
    }
    finally
    {
      Close();
    }
  }
  //完整使用完資料庫後,記得要關閉所有Object
  //否則在等待Timeout時,可能會有Connection poor的狀況
  private void Close()
  {
    try
    {
      if(rs!=null)
      {
        rs.close();
        rs = null;
      }
      if(stat!=null)
      {
        stat.close();
        stat = null;
      }
      if(pst!=null)
      {
        pst.close();
        pst = null;
      }
    }
    catch(SQLException e)
    {
      System.out.println("Close Exception :" + e.toString());
    }
  }


  public static void main(String[] args)
  {
    //測看看是否正常
    jdbcmysql test = new jdbcmysql();
    test.dropTable();
    test.createTable();
    test.insertTable("yku", "12356");
    test.insertTable("yku2", "7890");
    test.SelectTable();

  }
}
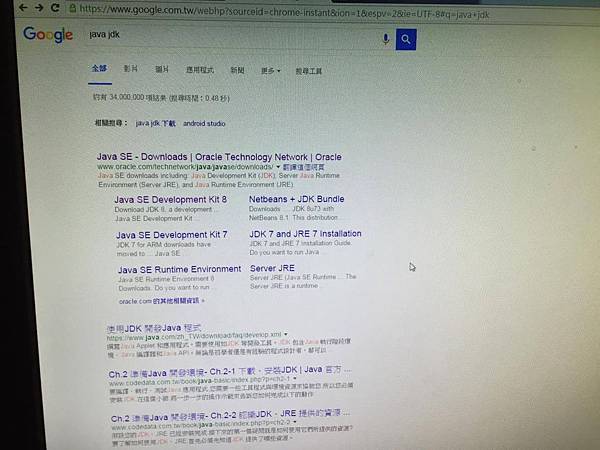
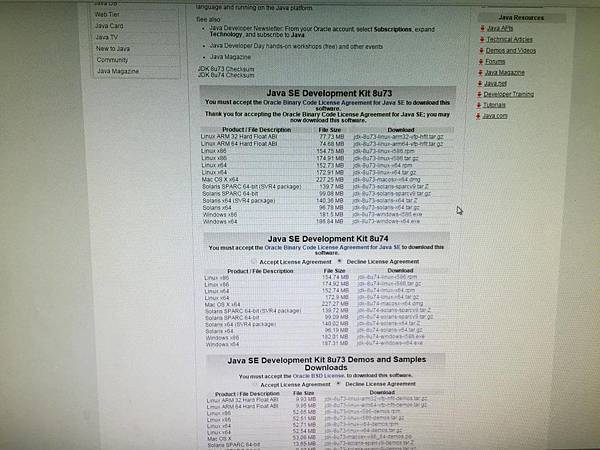
先在瀏覽器上搜尋 java jdk  點選第一個 Java SE - Downloads
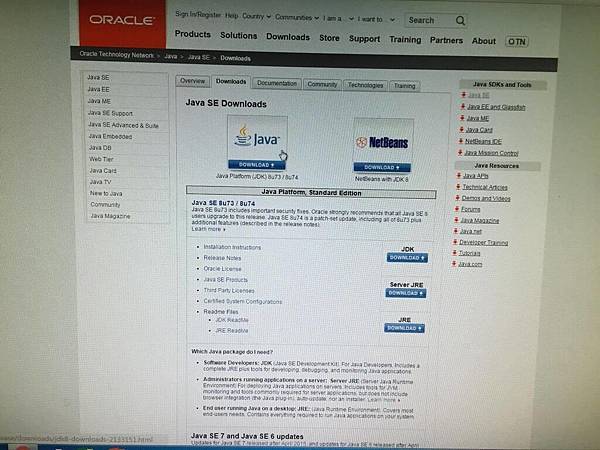
進入之後點游標所在的Java
再來點選游標所在的Accept License Agreement
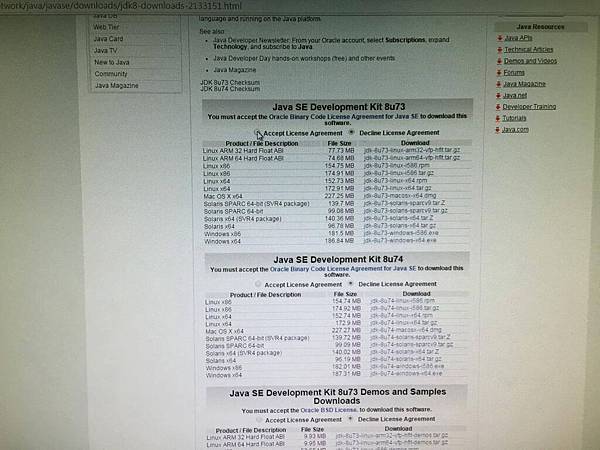
之後畫面會變為下圖

接著看自己的電腦屬於哪種的 (游標移到我的電腦 按右鍵 內容就可以知道了) 點選一下就可以下載喽
接著我們用一個簡單的例子試試看
public class HelloWorld {
    public static void main(String[] args) {
        System.out.println("Hello! World!");
    }
}
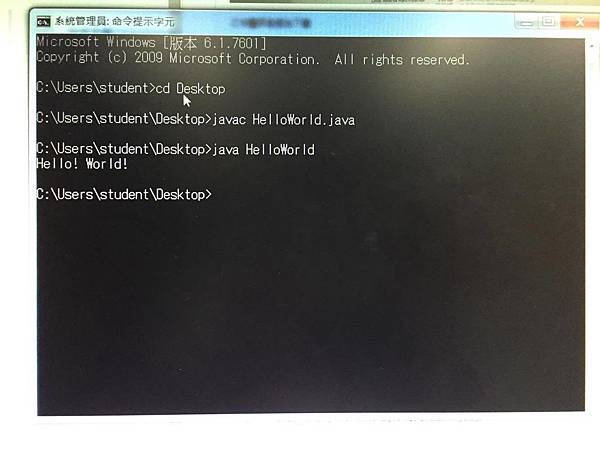
將上面程式碼複製到桌面新增文件 檔名為“HelloWorld.java”
成功跑出HelloWorld喽~~

第一支Android app程式教學


new11.jpg


軟體方面:你需要下載3樣東西
1. JAVA開發工具(Java Development kit - JDK)
2. Eclipse的JAVA開發環境(Eclipse IDE for Java Developers)
3. Android 開發工具(stand-alone Android SDK)
※ 各程式下載最新版即可
※ 有時候安裝不成功,不是你的問題,是程式的問題,請等官方解決


以上就是開發工具的安裝和開啟專案的步驟
至於Android APP要怎麼寫:

1. 首先,要會一些基礎JAVA

2. 去下面網址,從「建立第一個程式」看起,往下看完就學得差不多了
https://code.google.com/p/androidbmi/wiki/AndroidUI